How to install 3 layers of SuperQuilt – Pitched Roof
Here we detail how to insulate a pitched or flat roof using 3 layers of SuperQuilt Insulation.
The displayed method will achieve a U-value of 0.15, which is a popular target U-value if you are undergoing an refurbishment or roof extension in the UK.
By using our recommended detail, you will save considerable cost and installation time compared to Rigid PIR Insulation. A key benefit with our Triple Layer Detail is that shallow depth rafters are perfectly fine – No requirement to extend your rafters!
The guide below is specifically for pitched roofs. The guide is based on 100mm rafters, insulating purely from the inside of the loft (under rafters) This detail is also based on having a breather membrane over rafters.
Achieve a U-value of 0.15 in less cost, space and installation time compared to Rigid Board Insulation.
Following the below 3 layer guide of SuperQuilt to learn more!
view_day Insulation Materials
Method Steps
-
Measure and Cut SuperQuilt
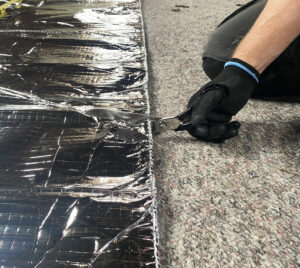
Measure the roof space to calculate how much SuperQuilt is required. We recommend to roll and install horizontal on the roof rafters. You can then cut the length of SuperQuilt required for your first layer. Allow an extra 60mm per rafter for the first layer, due to the recess.
-
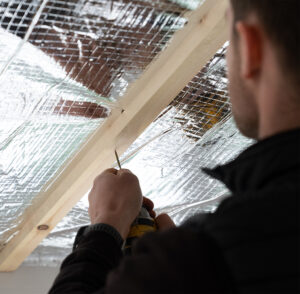
Install 1st SuperQuilt - Recessed
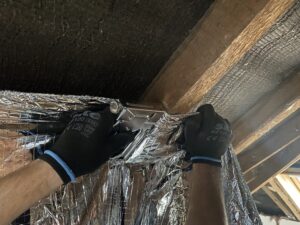
Start by fixing the first layer of SuperQuilt. We recommend the first layer to be recessed and stapled up into the rafters by 25mm-30mm. We recommend stapling the multifoil on both the sides of the rafters, and the fact of the rafters. Recessing in a nutshell is weaving the multifoil in and out of the rafters, whilst maintaining the product as a continuous layer. Ensure a 50mm overlap is applied.
-
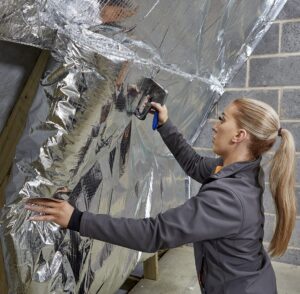
Tape and seal first layer of SuperQuilt
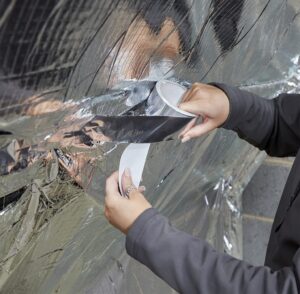
Once the first recessed layer is fully stapled and fixed in place, you are now ready to seal up SuperQuilt, using Thermaseal Foil Joining Tape. Fully tape and seal this layer over the overlaps, and around perimeter. This ensures the product works as a high performance Vapour Control Layer, reducing condensation.
-
Install 2nd Layer of SuperQuilt - Taut
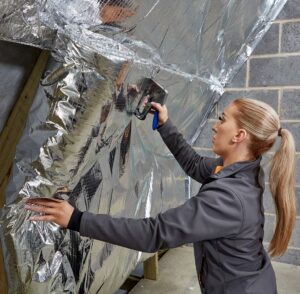
Next step is to install the 2nd out of the three layers of SuperQuilt. Nail this layer of SuperQuilt as a flat, taut, continuous layers under the rafters. We recommend nailing this layer, as stapling will be difficult as there will already be a layer of SuperQuilt wrapped around each rafter.
-
Tape and seal 2nd layer of SuperQuilt

Fully tape and seal SuperQuilt using Thermaseal Foil Joining Tape. Ensure it is sealed over the overlaps and around the perimeter.
-
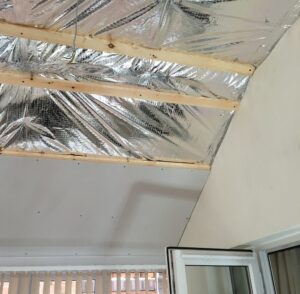
Fix 1st set of battens
Screw battens over the top of the 2nd layer SuperQuilt at 400mm centres. We recommend either 38mm or 50mm depth battens, check your bespoke PDF U-value calculation for clarity.
-
Install 3rd Layer of SuperQuilt - Taut
Staple the third and final layer of SuperQuilt. Staple this as a flat, taut, continuous layer using 14mm staples.
-
Tape and seal 3rd layer of SuperQuilt
Fully tape and seal SuperQuilt using Thermaseal Foil Joining Tape. Ensure it is sealed over the overlaps and around the perimeter.
-
Screw final set of battens
Screw second and final set of battens over the top of the 3rd layer SuperQuilt at 400mm centres. We recommend 25mm deep battens for this section.
-
Finish with Plasterboard
Screw 12.5mm Standard Plasterboard over the final battens, and skim.
Any questions at all, just get in touch here. You can either submit an enquiry or you can request a call me back. We are more than happy to assist you.
Disclaimer – Ecohome Insulation cannot be held responsible for any losses financially or physically from advice provided in this How-To-Guide.