How to Install SPC-Lux Flooring
Follow this guide to install your SPC-Lux Flooring.
We have broken the install down in to a few simple steps, so that it is easy to follow – but we also have uploaded a How to Video which will assist you with the install.
You can of course contact a member of our team, if you do require any further advise or assistance with this flooring project. We have a call me back and an enquiry form here.
Install your SPC-Lux Insulated Flooring by following our Step by Step how to guide.
We have made this clear to ensure that you can easily install the flooring, should you wish too.
You can use this in conjunction with our video and website details.
Method Steps
-
Measure the area of the Room
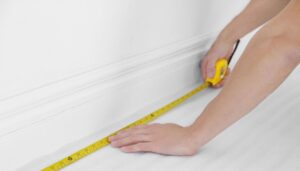
Measure the total area required, using a tape measure. You should measure the width and length.
-
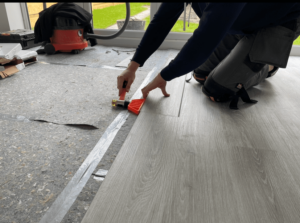
Start Installing SPC-Lux
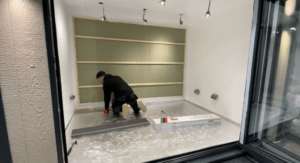
Begin at the back corner of the room, laying the SPC-Lux Flooring. Our recommendation would be to start with a a full board, just cut the final piece - when you come to the end of your run. This will start a scattered pattern.
-
Cutting the SPC-Lux
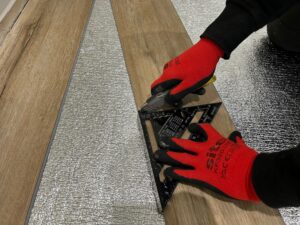
To cut the SPC-Lux you should use the Knife and the Set Square provided within the kit, to ensure that you have a perfect straight finish. Once you have scored the SPC Flooring Panel, you can then snap the board. TIP: Do not cut over a board that is down you'll risk scraping it as you'll apply pressure. Either go elsewhere to cut your SPC-Lux or you can flip an unused board over and use that as your base.
-
UNILIN Locking System
The SPC-Lux Boards are clicked together using the UNILIN Locking System, which makes the install easier than alternative Floorings. You'll be able to feel the board clicking in to place.
-
Tapping Block and Mallet
Use your Tapping Block and the Mallet that is provided in the Kit, to ensure than the panels are secured together nicely. The Mallet is rubber, so will not damage the SPC-Lux Panels.
-
Getting around the tricky bits...
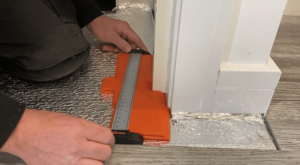
Within the kit you will have a Profile Gauge, this goes around shapes and replicates them - to ensure you can replicate the shape on the SPC Lux Flooring. To do this you place the Profile Gauge over the Flooring and mark the area required to remove. You can then cut the shape out of the flooring using a jigsaw.
-
Pull Bar
When you get near the edge it makes sense to then use the Pull Bar, so you can ensure that the Flooring is securely in to place all around the perimeter of the room. Use the Pull Bar in conjunction with the Mallet.
-
Radiator Pipes
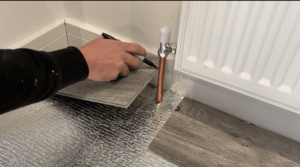
If you have any radiator pipes, using the Profile Gauge to get half of the curve of the radiator pipe and draw this shape on the end of your board. Do the same on another board, for the other side. Use the jigsaw to make the cut and slot each piece around the pipe. You may then wish to finish with pipe covers if necessary.
Disclaimer – Ecohome-Insulation cannot be held responsible for any losses financially or physically from advice provided in this How-To-Guide.