How To Insulate Your Hot Tub
This step by step How To guide explains how to Insulate your Hot Tub with the help of the Hot Tub Insulation Kit we have put together.
The Hot Tub Insulation Kit is designed to save and preserve energy when running your hot tub, so less energy is required to maintain the desired temperature!
Ecohome Insulation are the leading UK & European distributor of Multifoil Insulation products. We offer free next working day delivery to the UK Mainland (Order before 2pm)
view_day Insulation Materials
Method Steps
-
Working Out How Much Insulation You Will Need
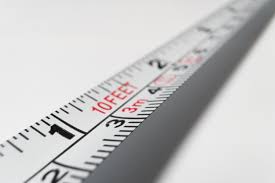
Firstly this may be easier with 2 people, measuring the edges with someone to hold the tape in place helps. If your Hot Tub is round, simply measure the circumference. TOP TIP: If you have a sewing/fabric tape measure, this will make this step easier for those who have a round Hot Tub. If you have a square hot tub, you can measure one side and multiply this by 4. If you have a rectangular Hot Tub, measure the shorter side and multiply by 2 then measure the longer side and multiply by 2. Add these 2 figures together. Note your measurements down, in preparation for cutting shortly.
-
Measure the Height of your Hot Tub
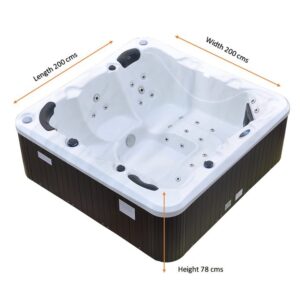
Checking the height of your hot tub at this point is important, it shouldn't exceed 1.2m - but if it does, Contact Us. The height of even the tallest hot tubs tends to be no higher than 100cm (1m). It is likely that your tub will range from between 70cm - 100cm.
-
Cutting the Multifoil Insulation to the correct length
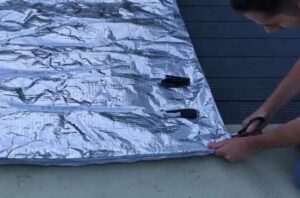
Looking at the measurements taken in Step 1, relating to the perimeter of your hot tub, Add 70mm to this figure. Roll the insulation out and then prepare to cut. TOP TIP: Pull the Insulation taut, prior to cutting with the Multifoil Insulation Scissors. This will compress the layers and make it easier to cut through. If preferred, you can use a cutting knife, just ensure that the insulation is taut and therefore compressed beforehand.
-
Removing the Side Panels of the Hot Tub
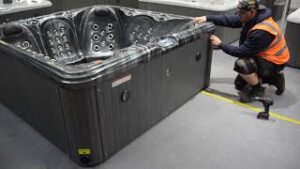
This process may vary depending on the type of Hot Tub you have, but you are likely to need a screwdriver for this stage. Your Hot Tub is likely to have screws on / around each of the corners on the panels. If you can remove the side panels, without removing the corner panels, this is ideal. TOP TIP: Do not remove the corner panels unless you have to, to release the main side panels.
-
Start Installing the MultiFoil
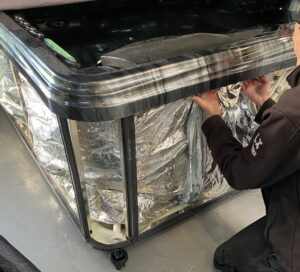
Now you can start installing the Multifoil Insulation. Begin by tucking the multifoil behind the corner panel / strip, this will help to secure the insulation in place whilst you get started. As the image shows, tuck the material in at the top and at the bottom edges - by tucking here, you are minimising the heat escaping and cold air entering. Keep repeating this around the perimeter of the hot tub.
-
Cut The Multifoil Where Necessary
For most of our applications, we advise to keep the multifoil in a continuous insulation layer - But we understand for this specific application there are certain parts such as the control panel and pipe work, that you may need to leave accessible and therefore exposed. Simply, cut around these areas with the scissors provided. Be careful not to cut anything other than the Multifoil Insulation.
-
Finishing Insulating
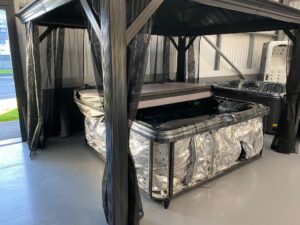
Once you have insulated around the whole perimeter of the hot tub (excluding the areas cut) then you should have a little excess insulation, which you can use to overlap slightly - This is in preparation for taping.
-
Taping Around Joints & Edges
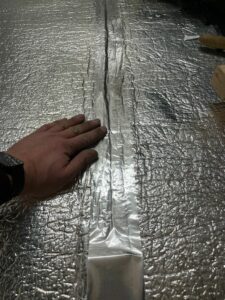
Using the Thermaseal Foil Joining Tape, begin by taping where you have just overlapped the insulation. You can then tape and seal around any edges where air may pass in or out. The aim is to keep the multifoil in a continuous layer as much as possible, so taping over any area where warm air may escape and cold air may enter.
-
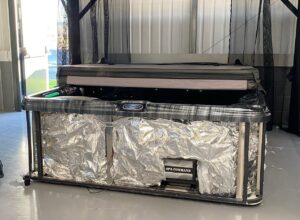
Reassemble Your Hot Tub, Relax and Enjoy

Once all taping has been completed, reattach your side panels ensuring they are securely screwed on as before. Then you can enjoy your newly Insulated Hot Tub.... Relax in it for longer, whilst safe in the knowledge you are using a lot less energy than you had used previously.
Disclaimer – Ecohome Insulation cannot be held responsible for any losses financially or physically from advice provided in this How-To-Guide.